How to use VRoid avatar (+other model) in cluster

One good use of a 3D avatar is VR-SNS. VRChat is one representative. Also, Virtual Cast is a good choice for streamers.
But I guess most suitable for the general users is cluster, which is available even with smartphones.
The cluster also hosts VR live performances and events to interact with VTubers, and recently it has become more of a VR-SNS. Then, you would want your 3D model that isn’t the initial avatar for the appeal.
It is becoming easier to buy models at the doujin shopping site Booth or Virtual Market (Vket), but if you want your own original avatar, your options are limited.
Seemingly One better choice is VRoid Studio from pixiv. By simply adjusting the parameters, you can change the appearance of your character as you would in a game, and you can also easily change outfits by purchasing texture files at Booth.

But on the other hand, there is a big problem. That is the avatar limitation in cluster.
cluster has a strict limit to the model to support smartphones, which is a big difference from VRChat and VirtualCast, which have no avatar limit. And the VRoid models do not support this limitation by default.
So in this article, I’ll explain how to lighten the VRoid model so that they can be uploaded to the cluster. If you have little knowledge of VRoid, you can do it.
cluster’s avatar limitation
First I explain the point, avatar limitation of cluster from its official documents.
Object: 256 or less (same hereinafter)
Polygon: 32000
Mesh: 16
Sub-mesh (primitive): 32
Bone (joint): 128
Material: 8
Texture (image): 16
Texture size: 2048*2048
When I uploaded my VRoid model, these alerts below emerged as shown above bolded.

Or you can see the status of models in VRoid Studio like this at [撮影・エクスポート]=>[エクスポート].

That means you can upload models if these numbers meet the limitation.
So let’s get started!
Lightweight configuration in VRoid Studio
From version 0.9, VRoid Studio supports weight reduction. So you can reduce the weight by working within VRoid Studio.
(If you haven’t installed it yet, you can install the latest version of VRoid Studio below.)
If you make your VRoid model in your VRoid Studio, nothing matters.
However, if you want to lighten a sold or distributed VRoid model, you will need a .vroid file, not a .vrm file.
If the .vroid file is not included, you can get it somehow or follow the procedure for non-VRoid models.
(Sorry, this procedure is still Japanese only, but figures and links still work!)
(1) Loading the VRoid model (You can skip it if you made it yourself.)
VRoid Studio does not load files from its menu but rather loads files from a specific folder, so place the .vroid file in the [vroid] -> [avatar] folder of the [document] folder.
Now it is ready to be loaded.

(2) Lightweight setting #1: reduce the hair bones
Next, open the [髪型編集] => [揺れもの] menu. In order to reduce the bones of hair here, we set the number of bone groups to 10 or less and press [ボーングループを自動生成] (or you can do it manually if you know).

Then the number of bones (joints) will be reduced to just the right amount.
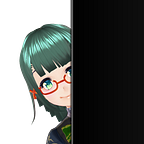
Note that if you are wearing glasses or hairpins like me, you need to make more manual adjustments from here.
(3) Lightweight setting 2 & output
Next, go to the menu [撮影・エクスポート]=>[エクスポート]. Here, check the Export Information to see how heavy the model is for the cluster’s limit.
Review: cluster limits
* Polygon count: 32,000 or less
* Number of materials: 8 or less
* Number of bones: 128 or less
Normally, the only setting you have to adjust would be the number of materials. So we’ll reduce the number of materials to 8 and change the resolution of the texture atlas to 2048.
Once the conversion is complete, you can export the file and you’re good to go!

If it doesn’t meet the limitation still, you can reduce the number of polygons and bones by selecting [ポリゴンの削減] and [ボーンの削減], taking care of its appearance right.
This is the end of the process of lightening the VRoid model!
Finally, try uploading the .vrm file from the cluster’s website. If it’s successful, you’re done! Good work.

It is recommended to save the lightweight model under an alias from [名前を付けて保存].
— — — — — — — — — — — — — — — — — — — — — — — — — —
Thank you for reading my article.
Follow me on Medium & Twitter!

- Twitter: https://twitter.com/omoi0kane
- Facebook: https://www.facebook.com/omoi0kane/
- note: https://note.com/omoi0kane
- Youtube: https://www.youtube.com/channel/UCpPeO0NenRLndISjkRgRXvA
This article is translated from my original Japanese article on note.com.